Configuration: Service > Code Tables > Custom Forms
Custom Forms are used for capturing signatures that cannot be collected using the Standard Signatures form. Custom Forms look and function very similarly to Standard Signatures but allow administrators to create custom-labeled signature capture fields. Some use cases are ride-alongs, refusals, and intubation confirmations.
Watch this video for a visual journey through configuring and collecting signatures in ZOLL emsCharts.
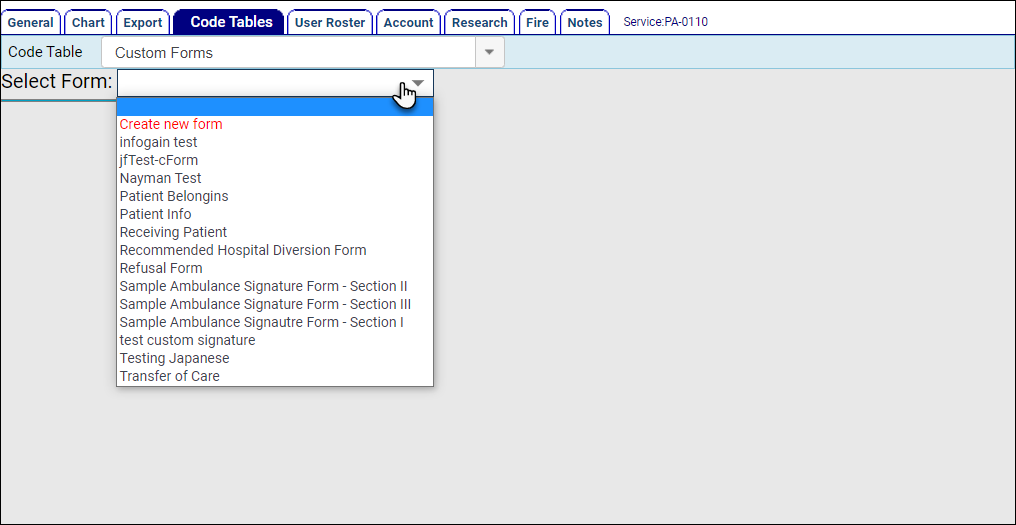
When you look at the Custom Forms Code Table, you will be presented with a Select Form drop-down. If you have previously configured Custom Forms in your system, they will be in this list and you can select them to make changes. If you do not have any Custom Forms already configured, or you need to create a new Custom Form, choose the 'Create new form' option.
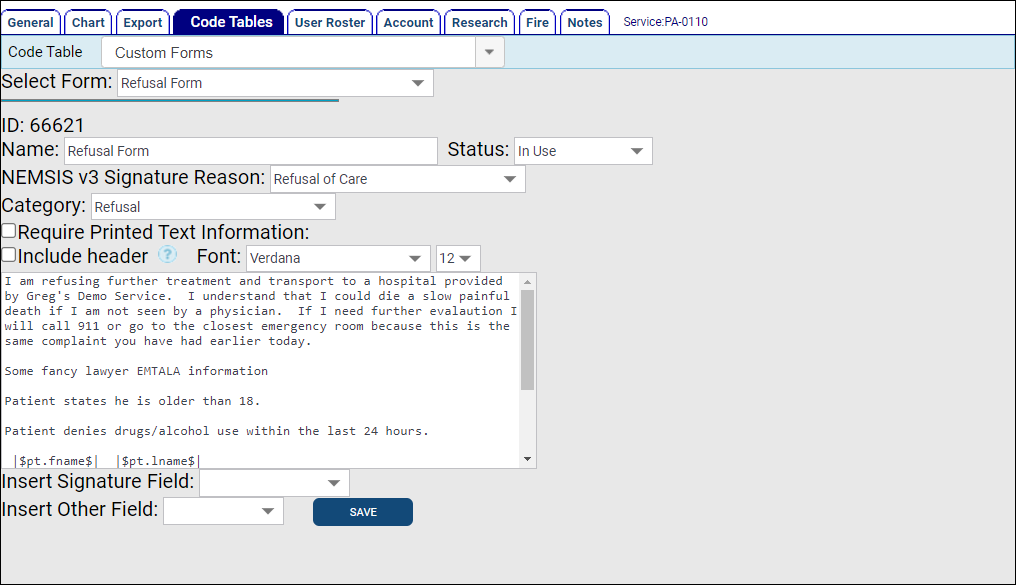
When editing or creating a Custom Form, there are several fields and options you can fill out and configure.
-
Name: Enter the name of your form as it will appear when selecting a Custom Form in charts.
-
Status: Set to 'In Use' to add the form as a selectable Custom Form in charts. Set to 'Draft' to hide the form from displaying in charts but still allow administrators to select and edit it in the Custom Forms Code Table. Set to 'Hide Permanently' to remove it from your system so it will not be selectable in charts and will be removed from the Custom Forms Code Table.
-
NEMSIS v3 Signature Reason: Select the Signature Reason (eOther.13) for your NEMSIS v3 exports.
-
Category: Choose the Attachment Category of the form.
-
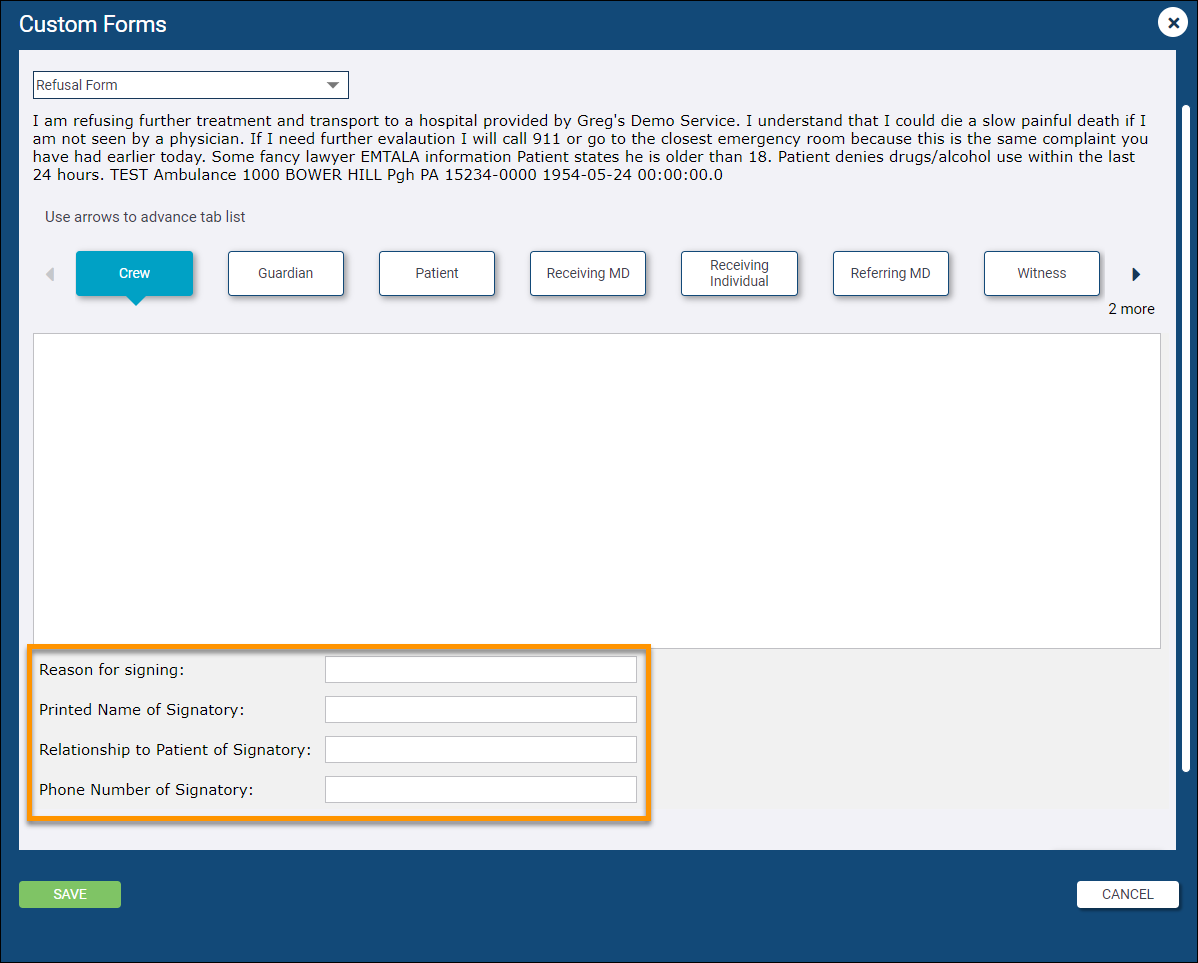
Require Printed Text Information: When checked, this option will force crews to fill out the signatory fields before they can save the form. The signatory fields include 'Reason for signing', 'Printed Name of Signatory', 'Relationship to Patient of Signatory', and 'Phone Number of Signatory'.
-
Include header: Check this box to include the following information on the printed Custom Form: Dispatched or At Pt Date, Service name and address, Referring and Receiving MD, Local ID, Pt Age/DOB, and other basic trip information.
-
Font: Choose the font and size of the Custom Form text.
-
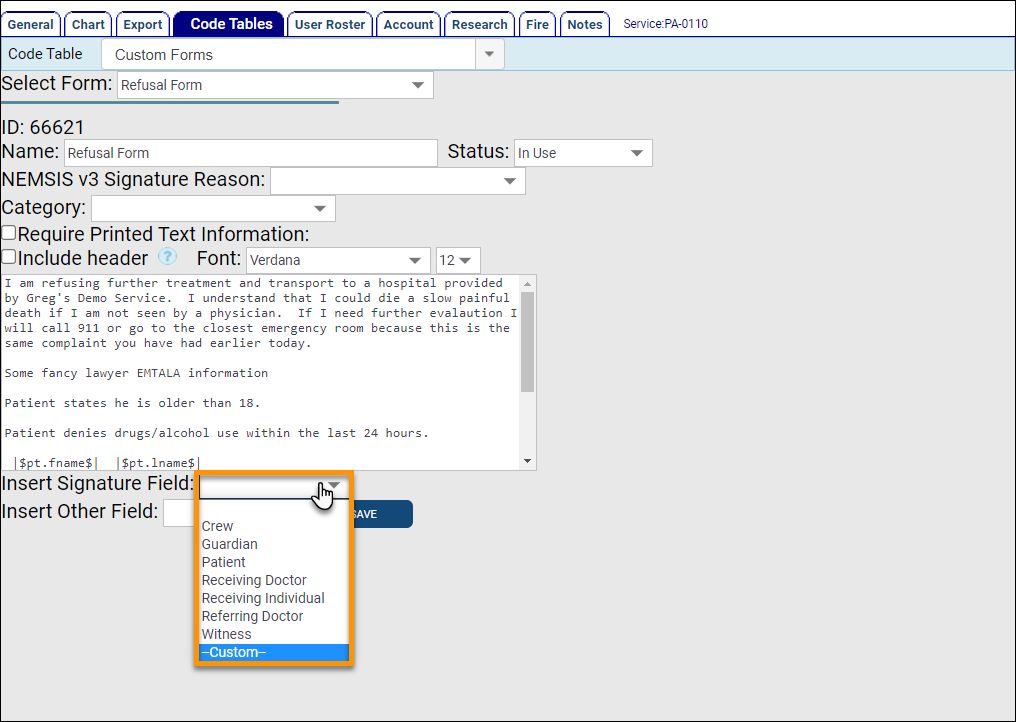
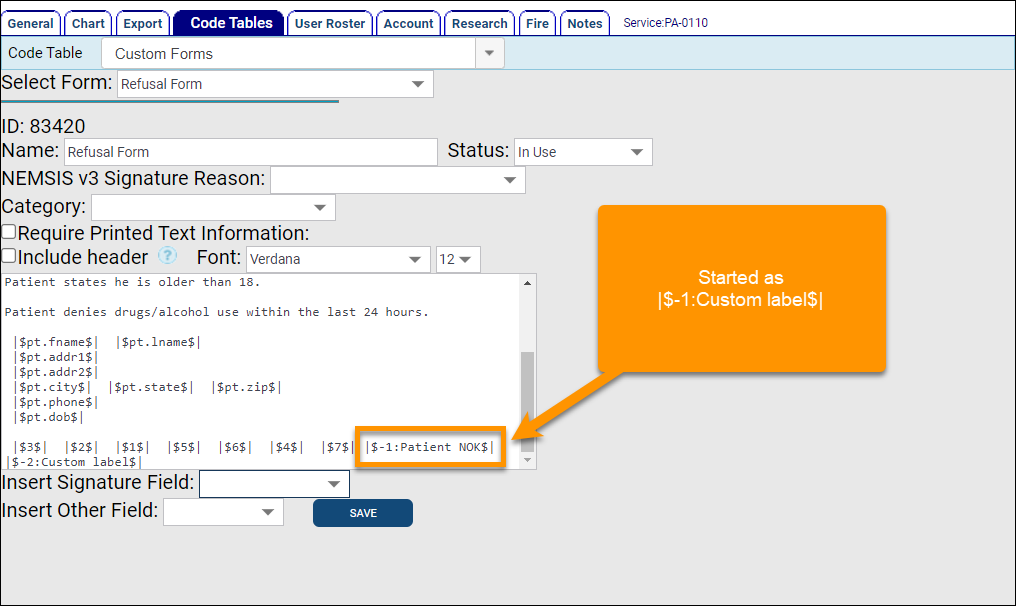
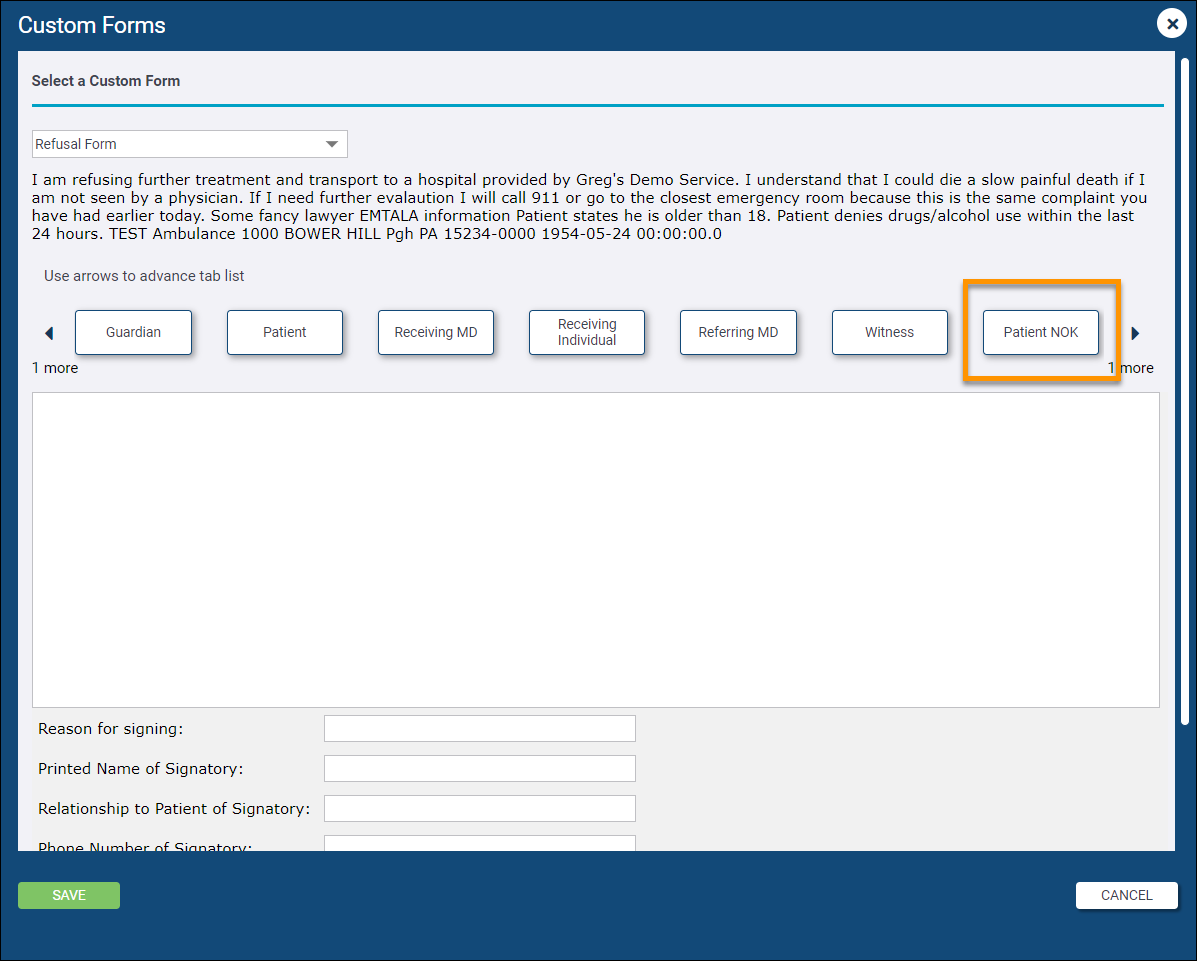
Insert Signature Field: Use this drop-down to add signature capture fields to your Custom Form. If you want to add a custom-labeled signature field, choose the '--Custom--' option. Choosing '--Custom--' will insert a variable of |$-1:Custom label$| into the free-text box, with the number incrementing by one each time you add another custom field (i.e. |$-2:Custom label$|, |$-3: Custom label$|, etc.). In the free-text box, highlight the words "Custom label" in the custom field variable, and type the label you want displayed for that signature capture field. For example, if we want a custom signature capture field labeled "Patient NOK", we would select '--Custom--' from the drop-down to insert the variable into the free-text box, then we would overwrite "Custom label" in the variable with "Patient NOK".
Note: The Signature Field variables will be added to the end of the text but will display above the text box in the Custom Form. They will display from left to right in the order the variables are added in the configuration. You can cut/copy and then paste the variables into a different order to make them display in that order when filling out the Custom Form in a chart.
|$-1:Custom label$| = |$-1:Patient NOK$|
The screenshots below show how this looks in the configuration and then how it will display to the crews in a chart.
-
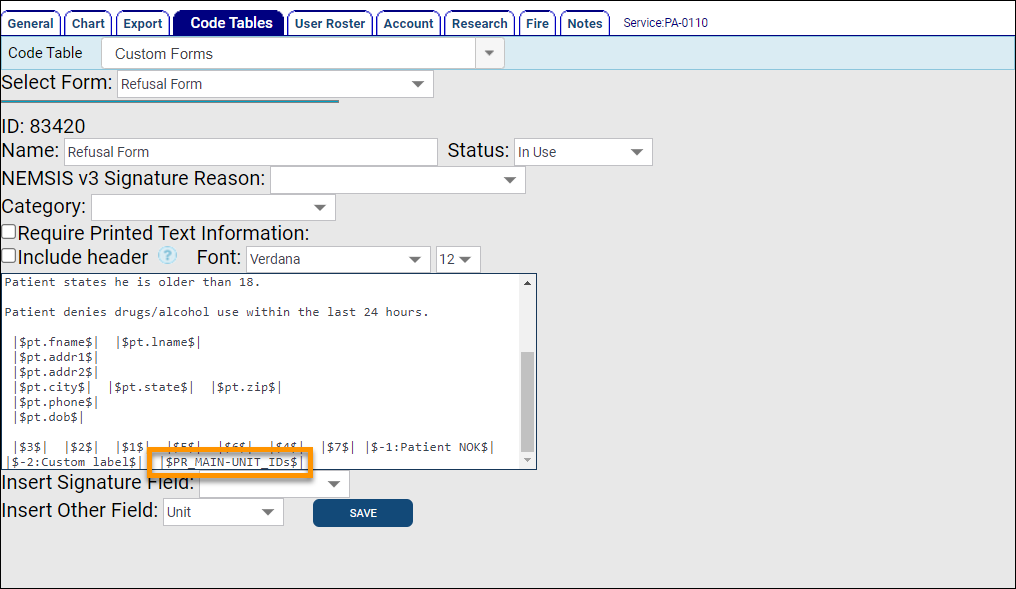
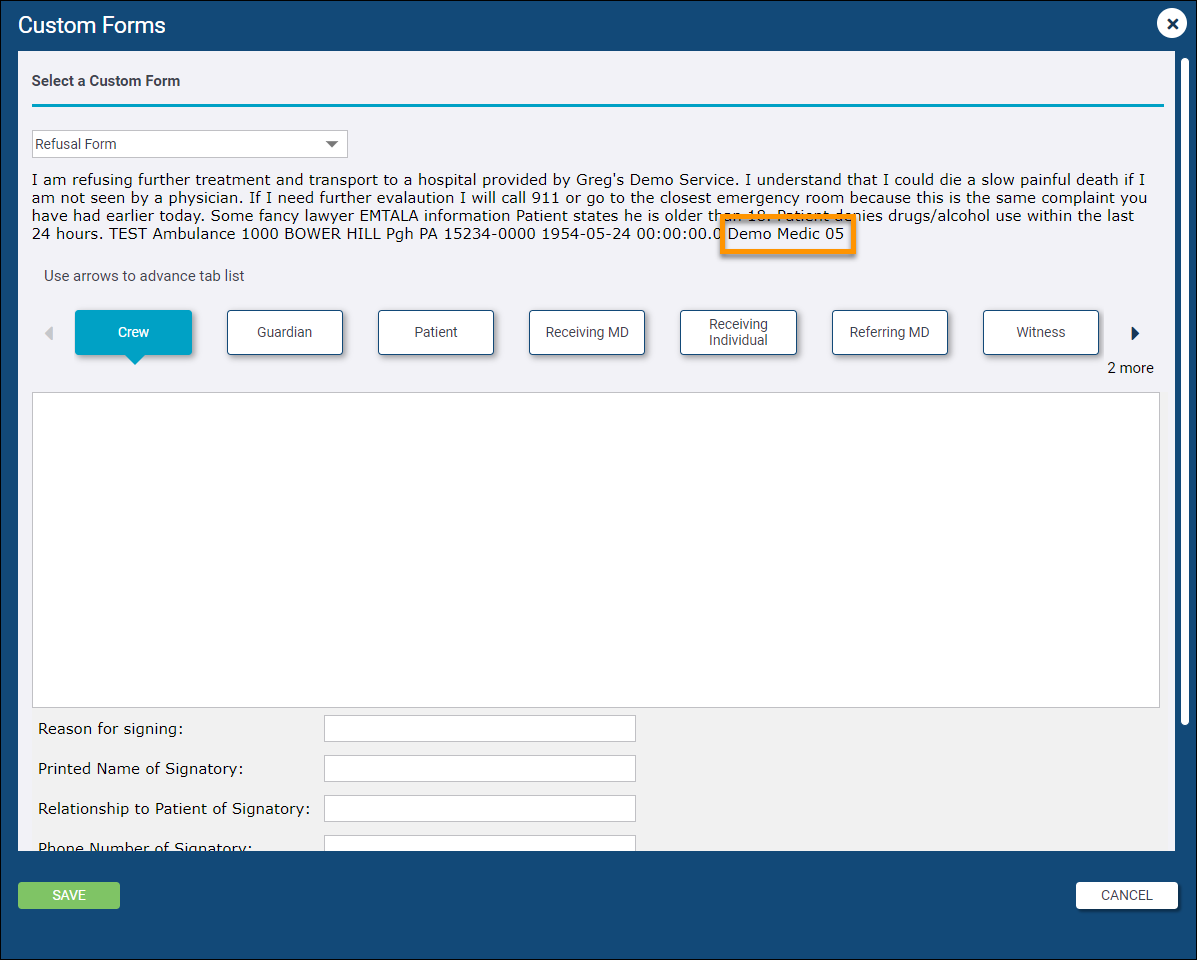
Insert Other Field: This drop-down functions similarly to the Insert Signature Field option. Use the Insert Other Field drop-down to select from available fields in a chart to insert, so that when filling out the Custom Form, the text displayed shows the data for those fields directly from the chart. For example, if we choose to insert the Unit field into our Custom form text, you will see a variable of |$PR_MAIN-UNIT_IDs$| inserted at the end of your text, but when you view the Custom Form in a chart, the text will display the Unit ID as it is entered on Page 1 of the chart.
Note: The inserted field variable will be added to the end of the text. To move it, just highlight and cut/copy and then paste it to the desired location within the text.
The screenshots below show how this looks in the configuration and then how it will display to the crews in a chart.
To learn about using Custom Forms in a chart, see Collecting Signatures.
